top of page

Phoenix Guitar Company Guitarmaking Class
This is a pictorial review of a guitarmaking class taught in our shop in 2016. It is very typical of our acoustic guitar class. In this class, both students decided to build Nylon String OMs.

Here, Jeff is gluing up his guitar back (cocobolo) in our plate joining jig.

This is Vic. He is using a router to cut the slot for his rosette.

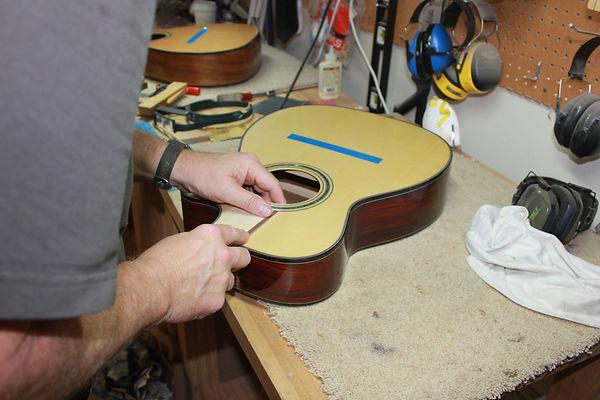
Jeff is gluing in his rosette. You can see one of his bent sides in the mold in the foreground.

Vic is clamping one of his sides into the mold after taking it out of the bender.

Here are the two rosettes, all glued up. Looking good.....

Next, after cutting the basic shape of the back braces on the bandsaw, the proper radius (25' in our case) is sanded onto one side of the brace.

Now the guys clamp their braces onto their backs, using 25' radius discs, and our go-bar deck.

Next, after shaping the headblocks and endblocks,. we glue them to the sides, starting to put the bodies together.

Here is Vic, after shaping his top braces, gluing them to his top, just as before. Both the tops and backs for these guitars will have a 25' radius.

Here are both tops, braced up--looking good.

Here are both backs, braced up--also looking good.

Here, Vic is using a radius dish as a sander, to profile the sides to meet up with the 25' radius of the top and back.

Now, time to glue on the kerfed linings. We glue in a "popsicle" stick every few inches to add to the side stiffness.

After fitting his top and back, Vic is using a dremel tool to cut slots in the kerfed linings that will accept the braces.

Jeff is gluing on his top.

Here are both guitars, tops and backs glued on.

Vic is using a router to trim the overhang of the top and back.

Jeff is using a special jig to route his end graft.

Vic is using our LMI binding cutter to cut binding and purfling slots.

At this point, the purfling under the side binding and the purfling around the end graft have to be mitered.

The binding being used here is plastic, so we use fiber tape to hold the binding in place.

once bindings are on, it's time to use the scraper...

More scraping....

And sanding....

While the guys are sanding and scraping, I'm doing some prep work, getting necks ready. Like cutting truss rod slots.

and jointing the headstock to get the proper angle...

Here, I'm routing the mortise slot in the body and the tenon slot in the neck...These steps are easy to make a major mistake, so I do them so the class can watch and see how it's done.

Now we can check the basic fit of the neck, and see if we need to make any adjustments.

After the fret slots are cut and the fingerboard is shaped, Jeff is using a jig to glue on the fingerboard bindings.

Vic is checking his neck alignment using a straightedge.

Once we're happy with the initial fit, it's time to glue on the fingerboards.

Next, we glue on the headstock laminates.

Time to do a little inlay work

Here, Vic is drilling his tuning machine holes. We're using a standard Stew-Mac jig for this.

Time to carve the neck...

Once necks are carved, and the neck and body are sanded to 220 grit, we fit the necks to the body, and tape off the areas under the fingerboard overhang and the bridge.

Here is Vic, wiping on his grain filler. When done, we'll sand it back and we're ready to start finishing.

For finishing, we'll spray a coat of shellac over the top, then our water base lacquer- EM6000. I like to spray 5-6 coats, sand flat, then spray 5-6 more coats, then do final sanding. Necks and bodies are sprayed separately. Here is Jeff, spraying lacquer.

Here is Vic, using a random orbital sander to do his final sanding.

After sanding from 600 through 4000 grit, it's time to use the buffer.
When we're happy with the buffer results, the neck is re-fit, and we chisel lacquer to the edge of the fingerboard.

After chiseling lacquer to the fingerboard edge, we glue on the necks. Here are both guitars, necks being glued...

Now, the bridge is re-fit. We scribe to the bridge edge, and chisel lacquer back to the scribe line.--very delicate work....

Here is the bridge, being glued.

Once the glue is dry and the clamps are off, we re-sand the fingerboard flat. We'll use a 20" radius beam to sand it.

Now, after sanding, cleaning out the fret slots, and preparing frets, we start hammering in frets. Jeff is in the foreground, Vic is in the background.

Once frets are in, we'll use the same sanding beam used to sand the fingerboard to level the tops of the frets.

Next, we crown the frets using a diamond crowning file.

Jeff is filing his fret ends

After frets are taped off, Vic uses several grits of micromesh to polish the frets.

Using a nut/saddle vise, we shape the nut and saddle

Doing the final setup, setting nut depth using nut slot files

Graduation day....Both guitars came out absolutely great, and equally important, we had a blast.
bottom of page